Sessions: One 1 hour session to build
Age: Kinder and up
Materials:
Low Fire Clay
A Variety of Clay Tools
Low Fire Glazes & Brushes
Kiln
Steps:
1. Cut off a piece of clay that is about as big as a baseball.
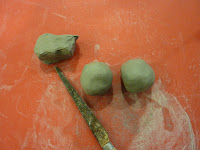
2. Cut it into 3 equal pieces, two will be for the body of the fish and one for adding on parts.
3. Make two of the pieces into spheres by rolling them in your hands. Put the 3rd piece aside for now.
4. Push your thumb into each sphere and start to squeeze around the side to create a small pinch pot, repeat this with the other sphere.
5. Using a scratching tool, "scratch-to attach" the edges of both pinch pots so they will stay connected together. Anytime we attach two pieces of clay together, we'll be using scratch-to-attach techniques.
6. Gently press both halves together and blend the seam until the shape is smooth, be careful not to dent in the sphere as you smooth. You can shape the sphere to be more egg shaped for the body of your fish but make sure that you are keeping a hollow space inside the clay--if it is squeezed to the point where its a solid piece of clay, it can explode in the kiln. HINT: You can use steps 1-6 to use as a base for building a lot of projects.
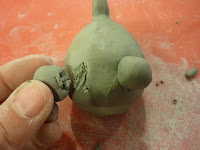
7. Now you are ready to start adding on your fish parts using your extra piece of clay that we put to the side. Start with the tail rolling out a hot dog shape of clay and bend it into a cresent moon shape, then scratch-to-attach it on to one end of the body. Then blend it into the body using your fingers and squeeze the tail thinner by pinching it and shaping it.
.jpg)
8. Next, add on two large spheres for bulging eyes and use a tool (or the back of a tool) to push in a pupil.
9. You can use a knife to cut the mouth open or just draw a mouth on, squeezing the cheeks gently will make the mouth open wider.
10. To add the dorsal fin, roll out a small hotdog shape and scratch-to-attach it on to the back of your fish. Then you can squeeze it thinner and shape it to be a little wavy with your fingers.
11. To make the side fins, start with a hot dog shape, flatten it gently and cut it in half with a knife, then scratch-to-attach one on each side of your fish.
12. Using a small loop tool you can gently press into the body of your fish to create a scale texture. You can also add different textures to the fins, tail and belly of your fish by using different tools.
13. You also have the choice of abstracting your fish by adding on other parts, like a hat, skateboard or making it hold something in its fins. Some of my students have made their fish wearing jetpacks, skiing or wearing a tutu! Let your finished fish dry before you bisque fire them and they are ready to glaze and fire again.
B CR8IV!!


.jpg)
.jpg)
.jpg)
.jpg)
.jpg)
.jpg)
No comments:
Post a Comment