Showing posts with label glue. Show all posts

Wednesday, April 18, 2012

Paper Bead Necklaces

In a tent city called Delmas 33 in Port au Prince Haiti, workers were busy creating beads from garbage papers they had found.  On a recent trip there, HOPE Art was lucky enough to learn how to make them and watch as they turned trash into necklaces, bracelets and earrings to be sold in the states which would in turn provide income and employment to Haitians.  I made the ones in the picture using a combination of magazines, postcards and food packaging.  


Collect your materials and  cut them into long skinny triangles.  The widest width of the triangle will be how wide your bead is and the length will determine thickness of your beads.  The thickness of the material you're using will also change the thickness of the bead.  Experiment with a few different sizes to gauge what kind of beads you want to make.  Next using a skewer, start to wrap the paper around the skewer tightly, starting with the widest part of the triangle.  When you get to the end, use a bit of glue to keep the bead from unwrapping.  Continue making your beads this way, you can keep them on the skewer if that's easier.  Once you have all your beads made you'll want to coat them with a clear lacquer to protect the paper, you can use clear spray paint, clear nail polish, modpodge, what ever you've got on hand.  You'll probably want to do a few coats and just keep the beads on the skewer the whole time until they dry.  Once dry, use some fishing line and other colorful beads to assemble your found art jewelry.   


!!!B CR8IV!!!

Friday, February 17, 2012

Twine Bird

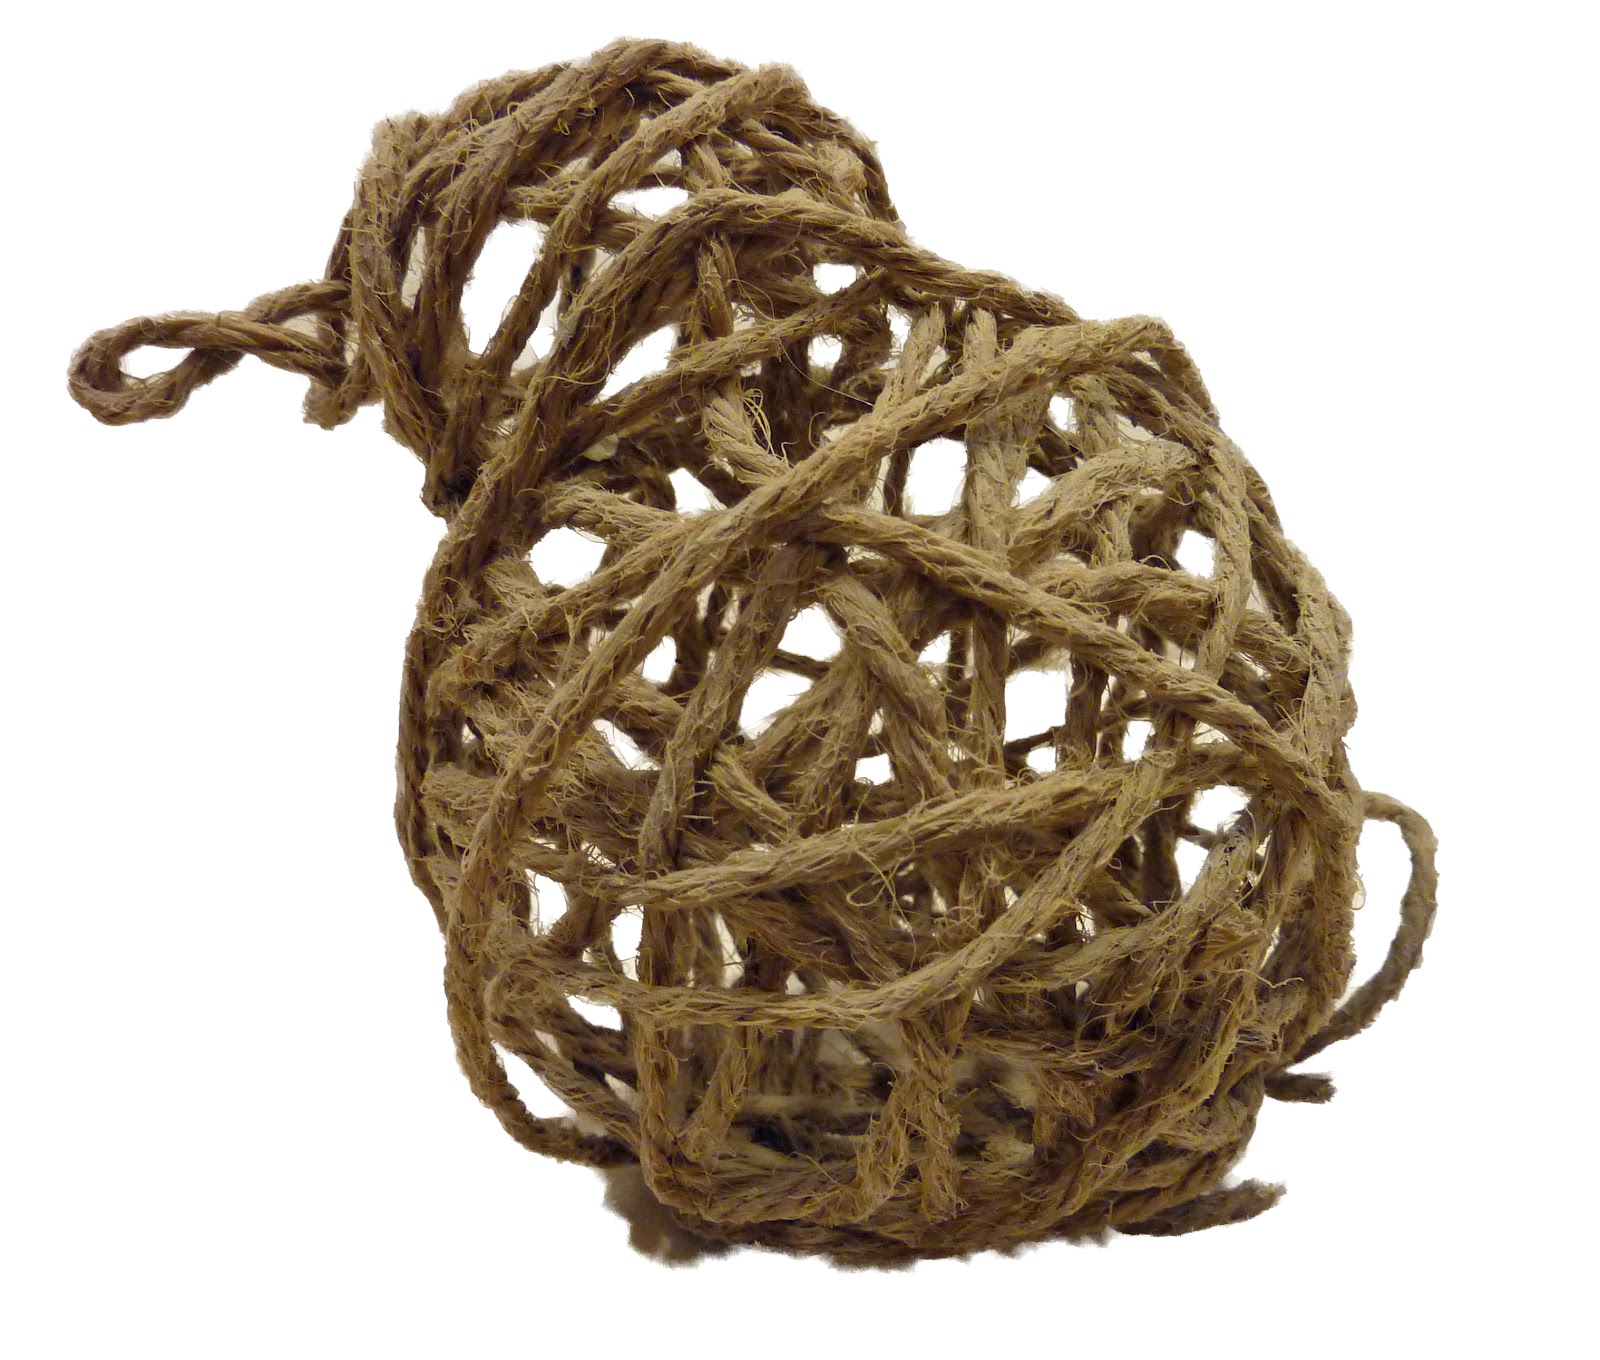
I created these hollow bird forms with my students as a way to express line and volume.  The artists Christo and Jeanne Claude would be great examples to introduce with this project too.

We started with two balloons, one for the body (about the size of a grapefruit) and a smaller one for the head.  I have students tape the balloons together with masking tape.  They can position the balloons so that the knot is where the beak will be on the head.  HINT: I also have students tape the knot of the body balloon to the table, it really helps to keep the balloons from rolling all over the place.

Once the basic form is ready, we took long lengths of twine and dipped them into fabric starch. HINT: Any natural fiber string will work for this!   The twine was then wrapped around the balloons and thought was given to the pattern of the wrapping while still maintaining the shape of the bird.  Some students let strings hang off of the back of the birds body in loops to create a tail, you could also do wings the same way.  Once wrapped, they were left to dry overnight.  As they dry the balloons should start wilting and peeling away from the string, if not you can pop the balloon.  Pull out all of your tape and balloons through one of the holes.  You can leave your bird with the natural string color or spray paint it.  Nests and eggs can be made the same way if you want to take it to the next step!

!!!B CR8IV!!!

Friday, December 23, 2011

Photo Collage

OK, so I know this isn't a clay project, so what is it doing on my blog you ask??  Well, it is a mixed media project and it could become a 3-D sculpture if you kept adding the boards together or created a cube out of multiple boards.  But the real reason I'm sharing this project is, I'll be creating these photo collages with my little artists in Haiti with Project HOPE Art in less than 2 weeks and I just wanted to share one of the projects we'll be doing there with the girls of OJFA (Young Girls In Action-in French).  If you'd like to donate to this amazing project click here: DONATE NOW!  Thank you and Happy Holidays!!

So here's how you do it!  Start by selecting and printing out a black and white photo of your choice onto plain white paper.  Use scissors or preferably an x-acto knife (if your students are old enough) to cut out the portions you are interested in using.  Think about the placement of the photo and glue it down onto a board (I used some scrap pieces of matte board I got for free at a framing shop).  Use a regular pencil to lightly sketch out what else you'd like to include in your piece and then use colored pencils to color the photo and enhance the area around the photo. Use your creativity to place the photo in a unique landscape or setting.


!!B CR8IV!!

Wednesday, December 21, 2011

Totem Poles

Native Americans of the Pacific Northwest have been carving totem poles for generations, this clay project exposes students to the traditional techniques and symbolism used by the carvers.  Start by showing students examples of totem poles and the symbolism of the animals used in the poles.  Generally the animals in the poles tell a pictorial story, this can be a way to incorporate a writing project with an art project in your classroom.  Once students have chosen their story or their choice of symbols and animals, its time to build.

Start by giving students 6-8 ping pong sized spheres of clay (one for each animal).  Have students break off a little bit of the clay and start by shaping the body of the animal, typically it will be round or oval shaped, then use the extra clay to make the body parts such as legs, arms, wings, tails, facial features etc... don't forget to scratch to attach on all the parts well.  Use tools to create details like scales on a fish or claws on a bear.  Once each animal is built, you will need to cut a hole from the top to the bottom of each animal, I used a thin wooden dowel.  The top animal of the totem pole only needs the hole to go in about halfway so that you don't see the dowel poking out the top of the totem.  Be sure to make the hole slightly larger than you think you'll need because clay shrinks when it dries and is fired.  Next, fire all the pieces, glaze them and fire them again.

Once all of the pieces are finished, its time to assemble them.  I use cut blocks of 2x4's for the bases, it's good to pre-cut these then have students write their name on the bottom and sand them smooth with sand paper.  I also pre-drill a hole into the center of the base the same size as the dowel that you'll be using to stack your totem.  Squeeze a little wood glue into the drilled hole and slide in the dowel.  While the glue is drying, have students wipe the sawdust off the bases and then paint them.  I used a black acrylic paint, but you can use any color you'd like or have students use markers to color them in so you don't have to wait for the paint to dry.  Once your base is ready, start sliding the animals onto the dowel, hopefully you've made the holes large enough and they all fit easily.  If you have trouble with fit, you can either use a smaller dowel or use a Dremel tool with a grinder bit and grind the hole in the animal larger (this can take some time!).  When you add the last animal on the top of the totem pole, put a little glue into the hole and fit it on snugly.  If the dowel is too long, just cut it to the correct height with garden shears, then glue on the top piece.  Have students share their totem story with the class!
!!!B CR8IV!!!

Friday, November 11, 2011

Chihuly Seaforms

Artist Dale Chihuly makes amazing and beautiful abstract forms out of glass.  This project mimics his series of Seaforms.  I use expandable wire mesh from Dick Blick Art Supplies  and have students cut a circle from the mesh or pre-cut your circles for younger students.  Then you can stretch, bend and shape the mesh into your seaform. 

Next students tear up small bits of tissue paper in the colors of their choice, then dip them lightly in watered down white glue and started wrapping it around the wire forms. If the paper gets too soaked, it will start to fall apart and can be really frustrating to work with, but if its just wet enough to make it stick, it should go on smoothly.  Make sure that students cover every area of the wire mesh and that the tissue paper is flattened smooth against the form; a brush can be helpful with that. It can get a bit tricky and sticky, so I always have a damp rag for each student to wipe off their fingers.  I also find that its best to cover one side of the form and let it dry and then come back for the second side.  As the glue dries, the shape will stiffen.  When the entire form is covered I have students paint a thick coat of Modpodge over the surface to seal the paper and to give a bit of gloss to the surface.  When finished the seaforms with be semi-translucent if displayed in the window.  These pieces could also be displayed for an art show hung from the ceiling like Chihuly ceiling at the Bellagio Hotel

!!!B CR8IV!!!